CURT 56158 Cablagem de reboque personalizada de 4 pinos do lado do veículo, compatível com Honda CR-V selecionado

Brand:CURT

3.6/5

88.94

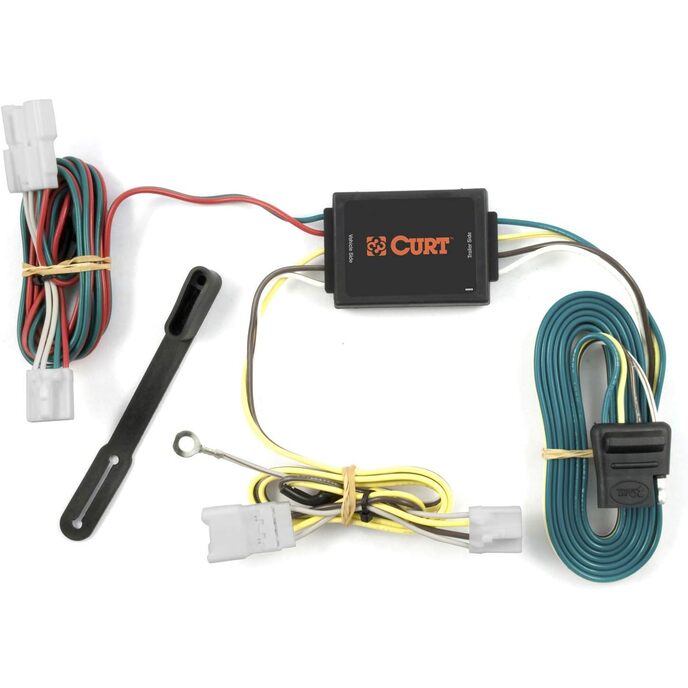
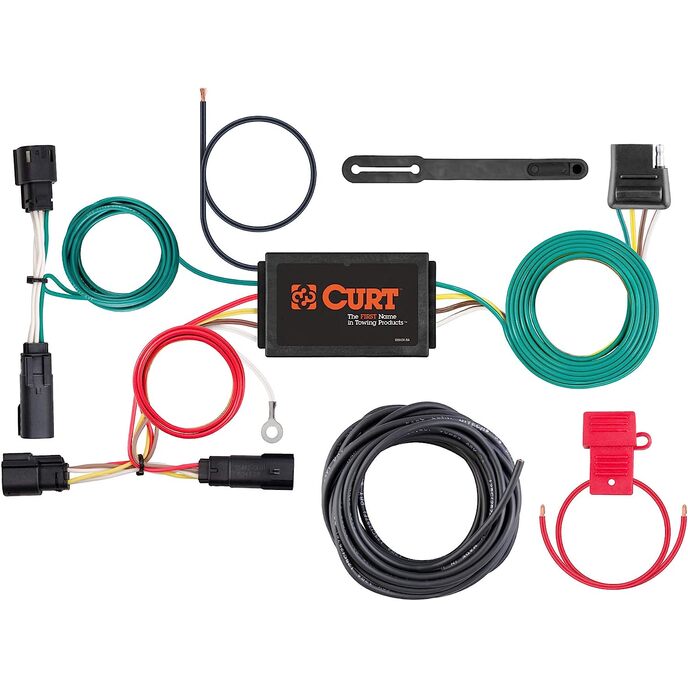
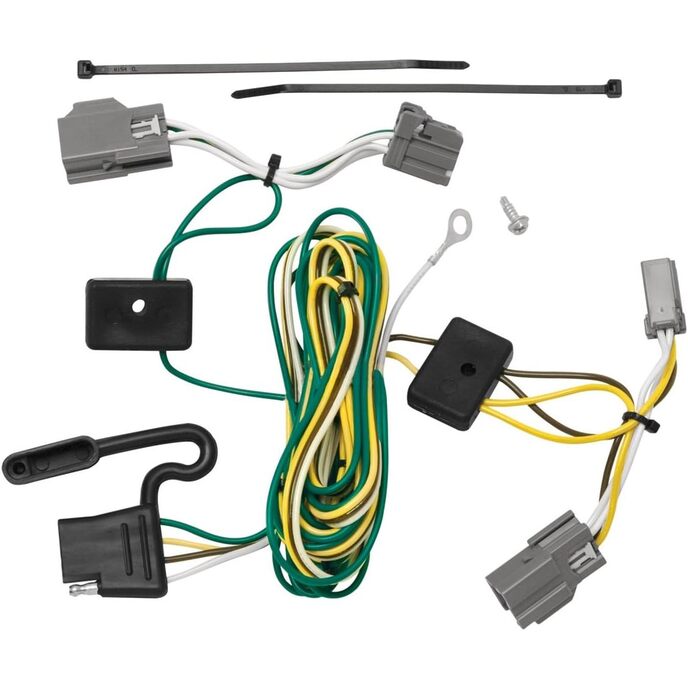
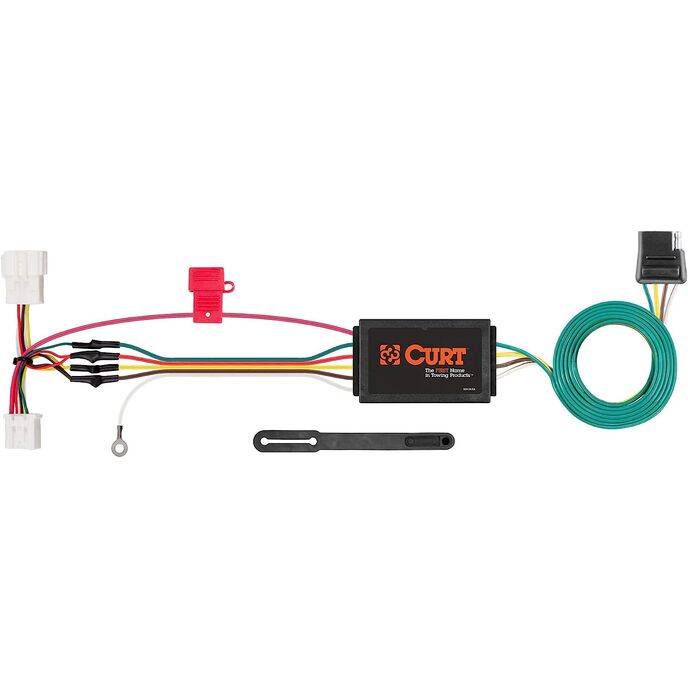
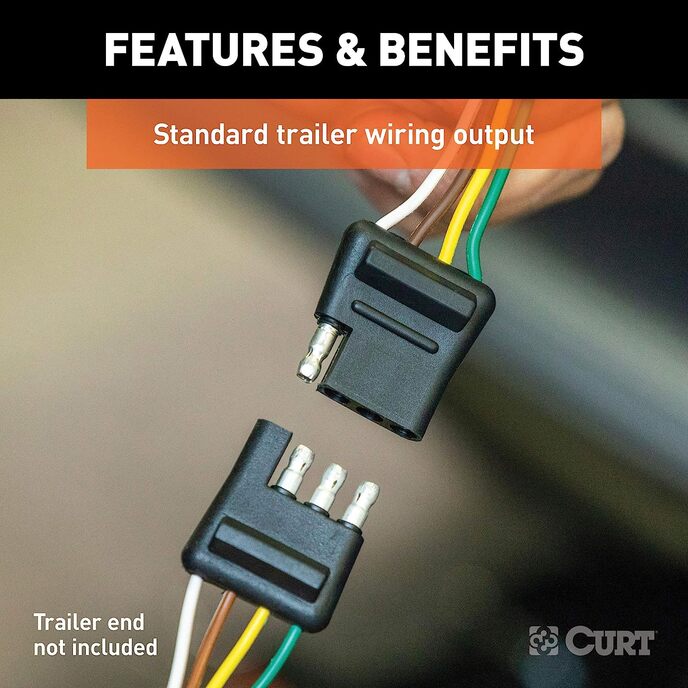
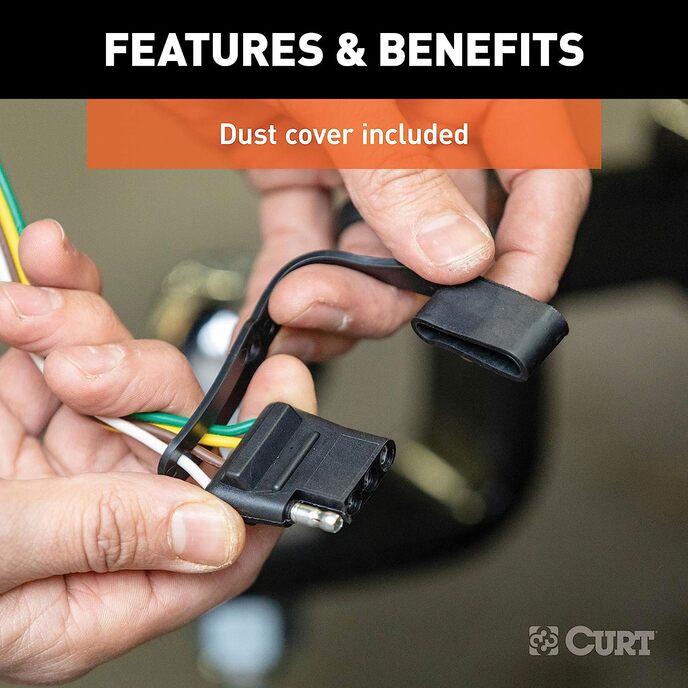
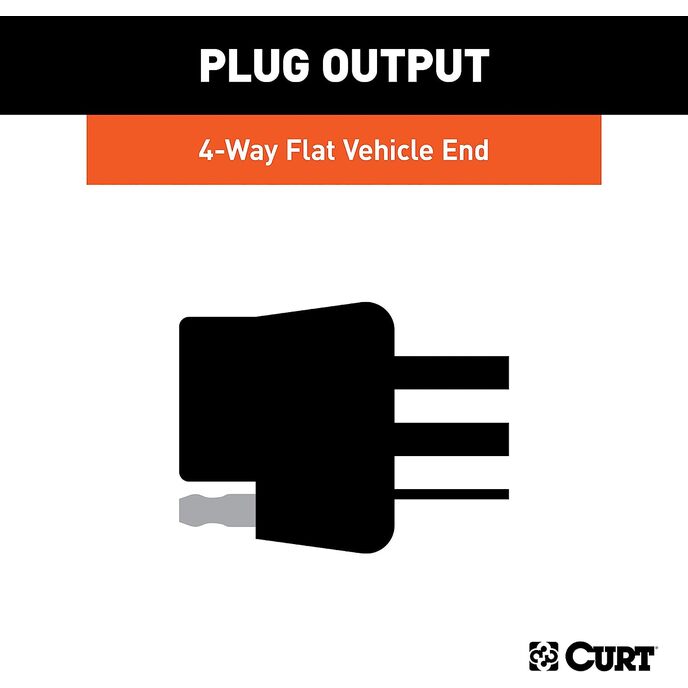
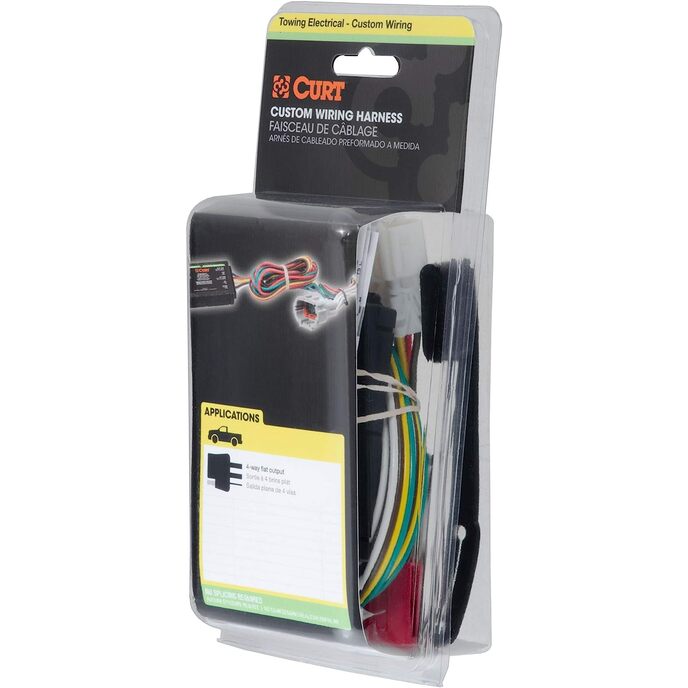
Se o seu veículo não estiver equipado com cablagem para reboque, a cablagem personalizada CURT é a solução ideal. Um chicote de fiação personalizado - também chamado de conector T - é um dispositivo elétrico simples e plug-and-play que se conecta ao sistema elétrico automotivo e fornece uma conexão de fiação de reboque universal padrão. Isso é feito usando dois ou mais conectores compatíveis com OEM específicos do veículo para conectar ao conjunto da lanterna traseira, eliminando a necessidade de cortar, emendar e soldar durante a instalação. Os chicotes elétricos personalizados são feitos para veículos específicos e, embora não estejam disponíveis para todos os veículos, eles oferecem uma das maneiras mais rápidas, fáceis e seguras de conectar um veículo para reboque. Este chicote de plug-in específico fornece um soquete de conector plano de 4 vias e foi projetado para ser um chicote de fiação personalizado para caber em determinados anos do Honda CRV (para verificar a compatibilidade do seu veículo, consulte as informações do aplicativo). Ele vem com todos os componentes de fiação necessários para estabelecer uma conexão de fiação de reboque confiável, bem como uma tampa contra poeira para manter o conector limpo quando não estiver em uso. Você tem uma imagem em mente do seu próximo destino - talvez seja o barco que desembarca em seu local de pesca favorito, talvez seja um acampamento com vista para uma das obras-primas da natureza ou talvez seja o próximo grande canteiro de obras. No entanto, transformar essa imagem em realidade exige mais do que apenas sonhar acordado. É preciso uma conexão sólida e a quantidade certa de energia. A fiação personalizada CURT é feita com algumas das tecnologias mais sofisticadas do setor e foi projetada para ser instalada com facilidade, proporcionando uma conexão elétrica duradoura para a configuração do engate de reboque.

COBERTURA CONTRA POEIRA. Para promover o uso duradouro e a resistência às intempéries, este chicote de fios de iluminação de reboque de 4 polos vem com uma tampa contra poeira de borracha. Ele se encaixa facilmente no conector plano de 4 vias quando não estiver em uso, protegendo-o contra os elementos externos. ENERGIA CONFIÁVEL. Este chicote elétrico de reboque de 4 vias é construído com tecnologia de montagem em superfície. Este tipo de circuito gera menos calor, intensidade de luz ideal e desempenho durável. ESPECÍFICO DO VEÍCULO. Este chicote elétrico de reboque de veículo de reposição foi projetado para anos selecionados do Honda CR V. CONECTOR PADRÃO. Esta fiação de reboque de 4 planos plug-in pode ser usada para conectar luzes traseiras de reboque, luzes de sinal de freio e indicadores de direção. A fiação de luz de reboque de 4 vias é popular em uma variedade de reboques, adicionando opções versáteis de reboque para seu veículo. FÁCIL DE INSTALAR. Sem corte! Sem emenda! Este kit de cablagem de reboque liga-se à cablagem de fábrica existente no seu veículo e equipa-o com um conector de cablagem de reboque traseiro padrão de 4 pinos para ligar e rebocar um reboque.
Brand CURT
Brand ‎CURT
Connector Type Plug-in
Country of Origin ‎USA
Customer Reviews 4.6 4.6 out of 5 stars 1,086 ratings 4.6 out of 5 stars
Exterior ‎Smooth
Is Discontinued By Manufacturer ‎No
Item model number ‎56158
Item Weight ‎13.6 ounces
Manufacturer ‎Curt Manufacturing
Manufacturer Part Number ‎56158
Material Rubber
Model ‎56158
OEM Part Number ‎56158

3.6

12 Review
5 Star
79
4 Star
12
3 Star
3
2 Star
1
1 Star
4

escreva sua revisão

O seu email não será publicado. Todos os campos obrigatórios são marcados com*

Scritto da: Lynn Malinoski
Know what you need
Works great for my car and you need a little mechanical knowledge but not too hard to install would recommend you to get
Scritto da: Minorkey
LOCATION OF CONNECTOR IN CAR AND TIPS FOR INSTALL.
2012 Honda CRV 1) Fine product. 2) BEWARE: the connector in car is Blue and behind the upper panel, not the lower panel !!!! To disconnect the connector, push in on the small tab at the middle right side of connector and it will be easily released. There is a grey connector behind the lower panel ( not to be used for this purpose). 3) If all my tools were right at hand, I could have finished this in one hr max. All went together easily once I found the correct blue connector. 4) Tools needed: Flat screwdriver and or small stiff putty knife for prying; phillips screwdriver ( power one ok); electric drill to mount ground wire with small bit. 5) Fuse is inline with the harness, not needed at fuse block under dash. 6) I could probably do it again in this model car in 30 mins.
Scritto da: Dave V
Installation can vary within and between CR-V model years - works great though
I give this wiring harness four stars because of the complications that arose during installation. I haven't used it yet (just installed yesterday) but did test it and all the test lights come on correctly. I own a 2014 CR-V and, like others, couldn't find the blue t-connector when I removed the lower rear trim panel. The Curt wiring harness installation video for the 2012 CR-V is accurate for that vehicle but not necessarily all of them. Honda apparently mounts the blue t-connector in one of two locations. The first is behind the lower rear trim panel as shown in the Curt video. The second location is behind the upper rear trim panel in a spot where you won't be able to see it by just removing the lower panel. The location can apparently vary between model years and even within a model year. The following youtube video shows how to install the wiring harness if the t-connector is located behind the upper rear trim panel - [...] Several important things that the Curt video misses for CR-V's with the t-connector mounted behind the upper panel are outlined in the youtube video above. They include: 1) the two fasteners holding the threshold in place are push-pin fasteners with center releases. Don't just pull up on them; they will break. You need to push down on the center of the pin to get them to release. The same goes for the cargo hook that needs to be removed. 2) The trim panel just behind the driver's side rear seat also needs to be removed. Don't worry; this is probably the easiest thing to do in the entire project. 3) The youtube video mentioned above shows removing the screws mounting the second row release seating handle to the body of the vehicle. I suggest following the Curt video for this and leaving the handle mounted to the body because it will help in figuring out where to mount the black converter box so it's not in the way. I will also say, the location of the t-connector behind the upper rear trim panel makes it very difficult to find a flat location to mount the converter box. The last thing I will mention is something that neither installation video discusses. It is INCREDIBLY DIFFICULT to get the push pin that is attached to the top, inside of the upper rear trim panel to go back into the hole above the triangular window! I consider myself very mechanically inclined and creative and the only way I could come up with doing it would be to break the ceiling material or remove the ceiling entirely. After messing with it for nearly 30 minutes I finally decided to simply remove the push pin and the trim was much easier to get back into place. Feel free to try and get it back into the hole but know that it looks just fine even if you don't. I hope this review helps, no one else goes through the frustration I did, and Curt puts a notification that there are multiple locations the for t-connector.
Scritto da: Michael G
Super easy to install, a nice time saver.
When we first bought our Honda CRV, I put a Class III hitch on it. We carried bikes often when we first bought it and already had the Class III hitch bike rack. I decided not to wire the lights, since we didn't plan to tow a trailer. At the time, the only option was to splice the wires for the lights and turn signals. Fast forward 8 years and now we are towing a small trailer for our kayaks. I was happy to find this Curt wiring harness. Talk about plug and play. It took longer to get to the plug that this unit connects to than the actual installation. There are lots of videos on YouTube and eTrailer that show you how to install it. My only complaint was the poor adhesion. By the time I put the panel back on, the box had already come off the sheet metal. I ended up using zip ties to hold it in place.
Scritto da: Helimech
Missing items
Looked to be high quality and fit and worked great. The 10amp fuse for the inline fuse holder and the double back tape for the control unit were missing.
Scritto da: J. Landa
It does fit a 2014 Honda CRV
Amazon says this does NOT fit a 2014 Honda CRV although the Curt site says it does. I ended up taking a chance and buying it. It did fit perfectly. Amazon is wrong. Several things slowed me down a bit. Calling customer service never gets answered. The option to press "1" for a call back does not seem to work. To remove the upper cargo hook you press in on the center button. Once you get the lower cargo hook and the pop fastener and the two handle screws out it get a bit more difficult. I learned that the left panel has some pretty stiff fasteners. The best tool I found was a stiff butter knife. Starting at the top, rear of the panel you slide it between the rubber seal and the panel and twist. This pops the top fastener. Take a flash light and look for the next one. move the knife close to it and continue to work your way down to pop the rest of them. Pull the panel far enough to find the blue connectors they talk about in the instructions. I can't speak for other models but on the 2014 CRV the connector is actually under the panel above the one you just loosened. I ended up loosening the top panel a bit to get to the connectors. There is a small tab on the connector that you press to separate them. The wires on the module are too short to use the double sticky tape. Where ever you can put it interferes with the seat handle or the air vent. I ended up using the longer tie wrap to strap it to the seat handle cable near the tail light. I thought about wrapping it to a roof drain line but it was a soft hose and I didn't want to obstruct it. I wish the wires to the module had been long enough to put the module in the trunk area. If the attached fuse ever blows I'll have to pull the panel off again. It took about 90 minutes to install some of which involved unanswered calls to the support center. Hopefully using this guide you can cut that time down to an hour.
Scritto da: Loren D. Hursh
Great parts, price and service!
Scritto da: Simon
Easy installation
Easy installation plug'n play.
Scritto da: Amazon Customer
Easy to install and worked exactly as intendeds.
This wiring harness is plug and play. You will need to remove and peel back some trim panels to install but the module and harness are great quality and performs exactly as intended.
Scritto da: Robert King
Worked perfect
Fit perfectly
Scritto da: Denis T.
This works better then hiring someone to wire in a harness.
I wish I bought this 5 year's ago! I had a trailer harness hardwired into my car by Uhaul and they did a terrible job. I kept having to cut back the exposed wires and replace the ends. This plug n play wiring harness tucks into my spare tire well when not in use and so will not be exposed to get damaged as easily. It's easy to install with simple tools. I did need to use my drill to make a new hole for the ground wire but this isn't mandatory. Great kit and likely the last wiring harness I'll need for this car.
Scritto da: McGyver
Perfect fit, great quality.
I purchased this for my 2015 CR-V. Perfect fit although not real easy to install but it’s Honda’s fault, not Curt’s. Usually the fuse is hidden behind the panel but in no way will I carry extra tools I case I need to change a fuse! So I instead cut a slot near the release handle recess and placed my fuse there. Now, if ever the fuse blows it’s a 10 second repair not a 30 minute frustration! It would have been easier if the fuse wires were 6 inches longer. It’s an extra 15 minutes to install the fuse in that location but you’ll thank me for it! So Curt, if you’re listening, longer is better!

Produtos relacionados

Conheça nossa rede internacional

Enviamos para 28 países, mais de 200.000 produtos. Fique atualizado, assine a newsletter.

Array